What are you looking for?
Make sure you have the latest firmware version on your Yeastar PBX.
If you didn’t already, Download the latest version of the QueueMetrics App, that you find in the Yaestar App Center.

Install or update the QueueMetrics app. Open the QueueMetrics app once the installation has concluded.
Here you will be greeted by the app configuration.
To request a Trial License just Click the link to request a Live ID.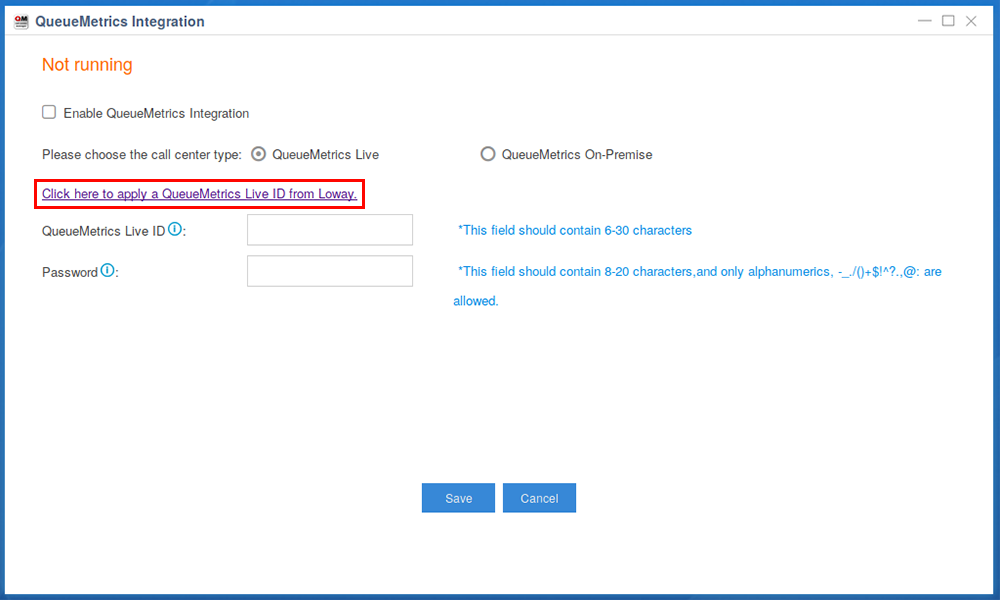 You will be redirected to a form on the QueueMetrics-Live website: Yeastar Trial Form
Once you have completed and submitted the form, within 2 working days, you will be contacted and issued a QueueMetrics-Live Trial License.
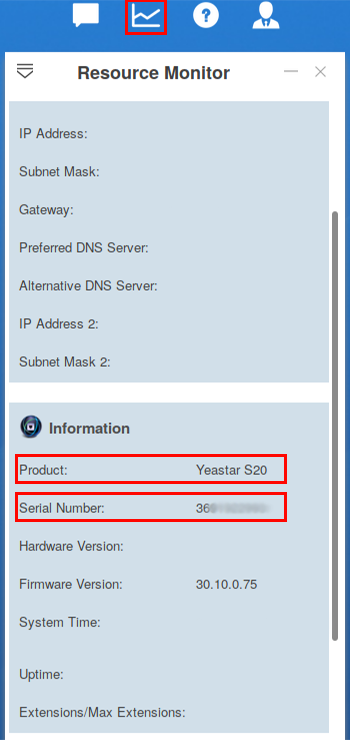
Note: the Yeastar Product and Serial number can be found under the “Resource Monitor” section of your PBX.
Once you received the License information we can link your Yeastar PBX with the QueueMetrics-Live instance.
If you didn’t already, Download the latest version of the QueueMetrics App, that you find in the Yaestar App Center.
Install or update the QueueMetrics app.
Open the QueueMetrics app once the installation has concluded. Here you will be greeted by the app configuration.
To request a Trial License just Click the link to request a Live ID.
You will be redirected to a form on the QueueMetrics-Live website: Yeastar Trial FormOnce you have completed and submitted the form, within 2 working days, you will be contacted and issued a QueueMetrics-Live Trial License.
Note: the Yeastar Product and Serial number can be found under the “Resource Monitor” section of your PBX.
Once you received the License information we can link your Yeastar PBX with the QueueMetrics-Live instance.
Open the QueueMetrics App on your Yeastar and make sure you enabled the QueueMetrics Integration (1) and the “QueueMetrics On-Premise” mode (2).
Input the URL (make sure it is http and not https) you received in the e-mail (3) the Username (4) and the Password (5).
Now you can Save (6) the configuration.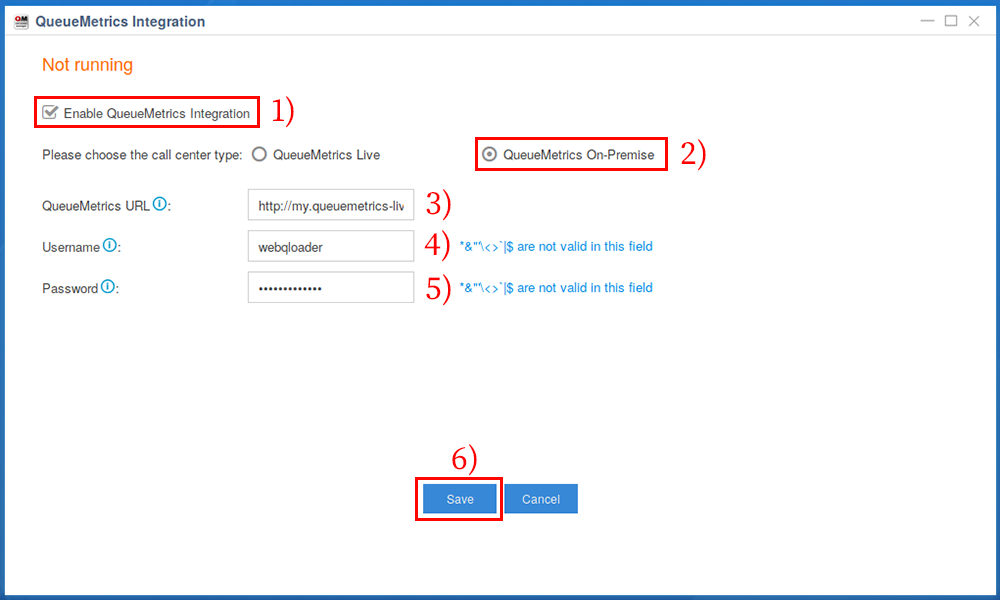 The Username is always going to be “webqloader”; that’s the user that takes the information from your PBX, and sends it over to your QueueMetrics-Live instance.
You will now be given a Link that you can follow to start using your QueueMetrics-Live instance.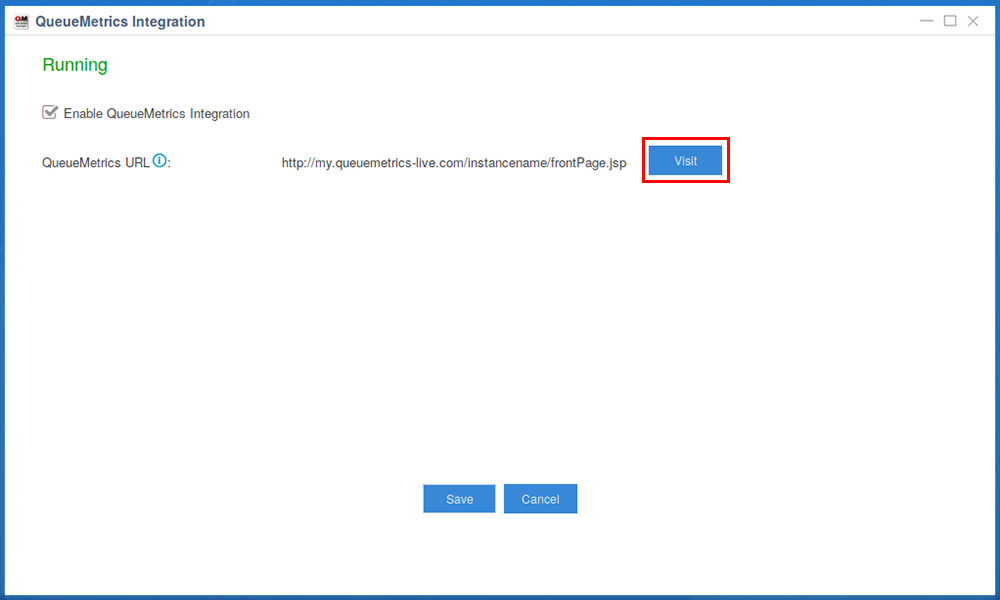 You can bookmark this link and use it to log in your QueueMetrics account.
To access your account it should be enough to use your E-mail and the Initial password that was given to you in the E-mail you received.
Input the URL (make sure it is http and not https) you received in the e-mail (3) the Username (4) and the Password (5).
Now you can Save (6) the configuration.
The Username is always going to be “webqloader”; that’s the user that takes the information from your PBX, and sends it over to your QueueMetrics-Live instance. You will now be given a Link that you can follow to start using your QueueMetrics-Live instance.
You can bookmark this link and use it to log in your QueueMetrics account. To access your account it should be enough to use your E-mail and the Initial password that was given to you in the E-mail you received.
Once the integration with the Yeastar PBX was successful, we can start setting up QueueMetrics.
First, create the Queue you want to monitor inside QueueMetrics:
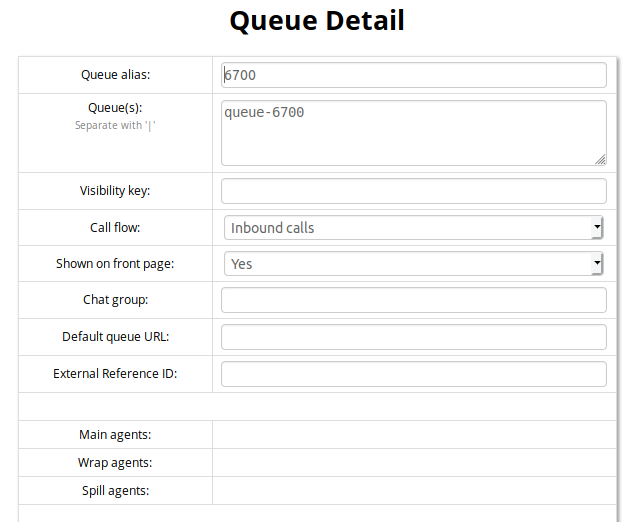
Note: if the queue on your PBX is called “6700”, when creating the same queue in QueueMetrics add “queue-“ before the queue number.
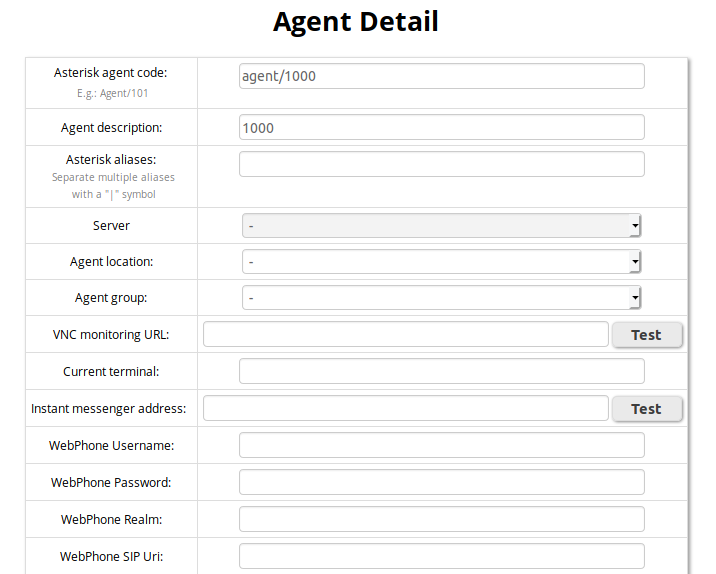
Create the Agent:
If your agents are going to use the QueueMetrics Agent Page to interact with the software, create a user for the Agent:
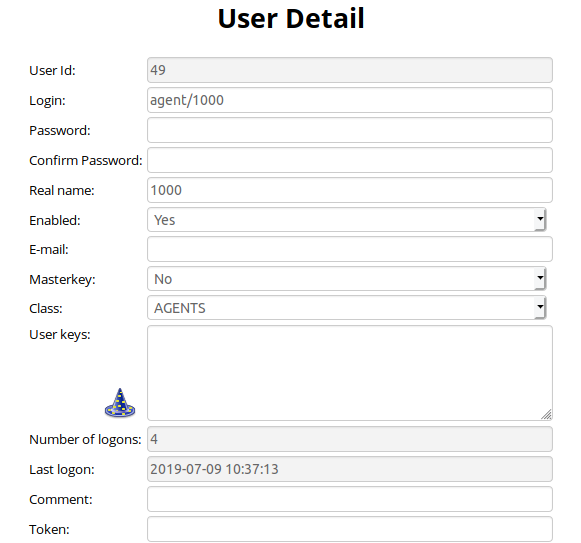
Note: the Login for the user will have to be the same as the agent we just created.
Don’t forget to add the “AGENTS” class to the Agent.
You should be all setup to start using the software from here.
Create a different agent for each of your extensions and a different queue, inside QueueMetrics, for each queue on your Yeastar PBX.
From here on you can find tutorials on different topics in our documentation, or feel free to get in touch with our support team for any needs that you might have at support@loway.ch
Our complete documentation can be found here:
QueueMetrics Documentation
For a list of Tutorials, on different topics, you can follow this link:
QueueMetrics Guides
First, create the Queue you want to monitor inside QueueMetrics:
Note: if the queue on your PBX is called “6700”, when creating the same queue in QueueMetrics add “queue-“ before the queue number.
Create the Agent:
If your agents are going to use the QueueMetrics Agent Page to interact with the software, create a user for the Agent:
Note: the Login for the user will have to be the same as the agent we just created.
Don’t forget to add the “AGENTS” class to the Agent.
You should be all setup to start using the software from here.
Create a different agent for each of your extensions and a different queue, inside QueueMetrics, for each queue on your Yeastar PBX.
From here on you can find tutorials on different topics in our documentation, or feel free to get in touch with our support team for any needs that you might have at support@loway.ch
Our complete documentation can be found here:
QueueMetrics Documentation
For a list of Tutorials, on different topics, you can follow this link:
QueueMetrics Guides


